Table of Contents
Managing ‘Documents and Data’ on your iPhone is crucial for optimizing storage and ensuring your personal information is secure, especially when upgrading or selling your device. This article offers a comprehensive guide to help you understand and manage your iPhone storage, use the Files app effectively, optimize storage with cleanup tools, manage documents without deleting media, and safeguard your data during transitions.
Key Takeaways
- Understanding iPhone storage involves checking usage, identifying data-hungry apps, and managing ‘Other System Data’.
- The Files app is a powerful tool for managing local and iCloud files, as well as recovering recently deleted items.
- iPhone cleanup tools can optimize storage by removing duplicates, clearing cache, and managing similar images.
- You can manage documents and data without deleting photos or videos by offloading apps and utilizing iOS storage settings.
- Before upgrading or selling your iPhone, it’s essential to back up important files, wipe personal data securely, and transfer data to a new device.
Understanding iPhone Storage and Data Management

Checking Your iPhone’s Storage Usage
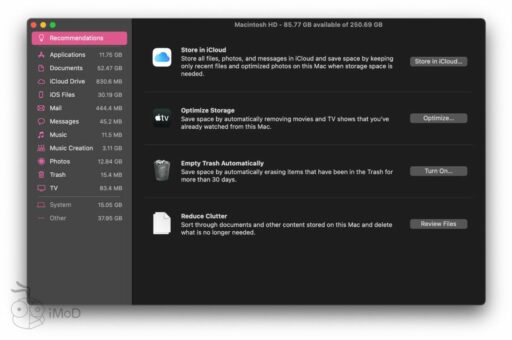
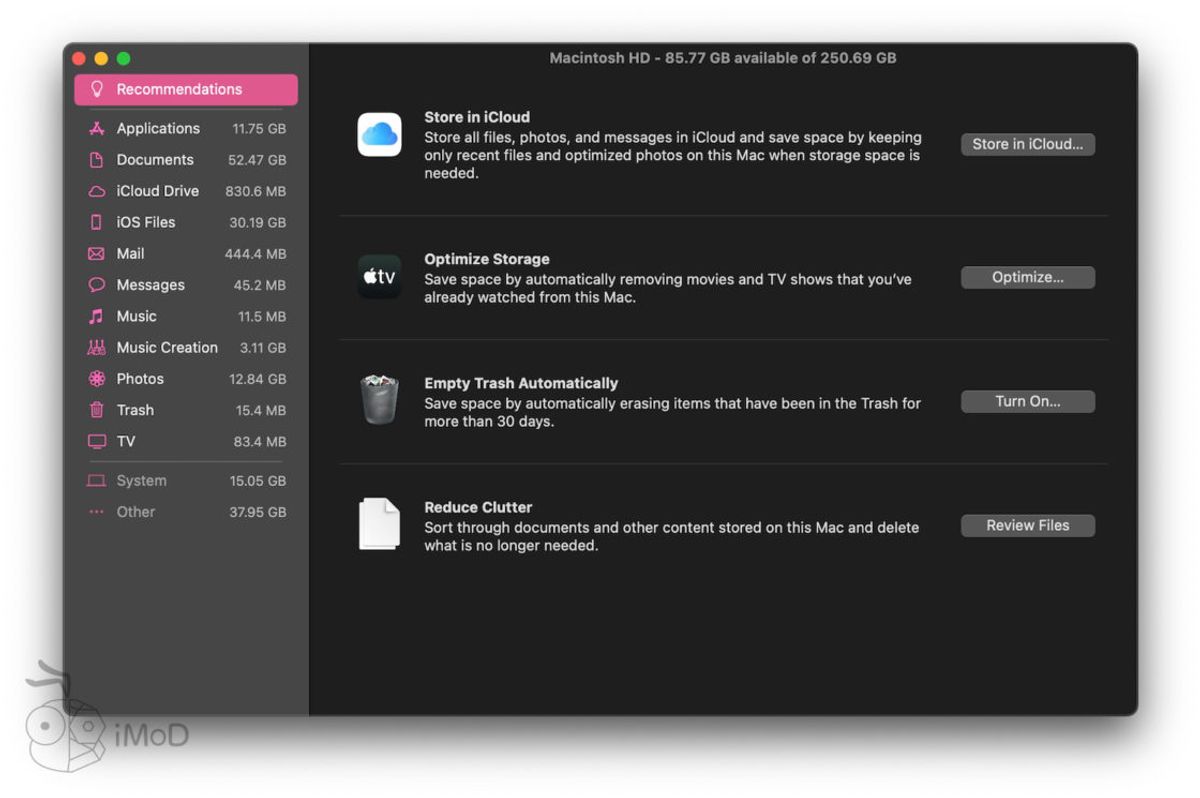
To keep your iPhone running smoothly, it’s important to regularly check how much storage you’re using and what’s taking up space. First, navigate to Settings > General > iPhone Storage. This will provide a comprehensive overview of your storage situation. You’ll see a list of recommendations for optimizing your device’s storage, as well as a breakdown of how much space each app is using.
- Go to Settings > General > [Device] Storage.
- Tap on an app to see more information about its storage usage.
Your iPhone will automatically manage cached and temporary files, removing them as needed to free up space. However, if you notice discrepancies between your device’s storage and what’s reported in Finder or iTunes, it’s because these services categorize cached files as ‘Other’.
Offloading apps you use less frequently is a quick way to reclaim storage without losing any documents or data associated with those apps.
Identifying Data-Hungry Apps
To manage your iPhone’s storage effectively, it’s crucial to pinpoint the apps that consume the most space. Start by navigating to Settings > General > [Device] Storage to get a comprehensive view of your storage usage. Here, you’ll find a list of all installed apps along with the storage each one occupies.
By tapping on an app, you can see detailed information about its storage footprint and take appropriate actions. For instance, offloading an app can significantly free up space while preserving its data, which is ideal for apps you use infrequently.
Apps like social media platforms can accumulate large amounts of cached data. Regularly clearing this ‘offline’ data can prevent these apps from becoming bloated and using excessive storage. Below is a step-by-step guide to help you identify and manage these data-hungry applications:
- Open the Settings app and navigate to General > [Device] Storage.
- Review the list of apps and their storage usage.
- Select an app to view more details.
- Consider offloading apps you rarely use to save space.
- Clear cache and temporary files where possible to keep the app’s size in check.
The Role of ‘Other System Data’
The ‘Other System Data’ on your iPhone encompasses a variety of elements that are not directly listed under your apps or media files. This includes system caches, Siri voices, fonts, and dictionaries, as well as logs and other system essentials like the Keychain and CloudKit Database. These files are crucial for the smooth operation of your iOS device, but they can accumulate over time and occupy valuable storage space.
To manage this storage category effectively, it’s important to understand that not all ‘Other System Data’ can be removed. However, there are steps you can take to minimize its footprint:
- Regularly restart your device to clear temporary caches.
- Streamline your device by removing unused apps and data.
- Perform a backup and restore, which can clear persistent caches and system data.
Remember, your iPhone will automatically manage these files to some extent, deleting them as needed to make room for new data. But taking proactive steps can help maintain optimal storage levels and device performance.
Using the Files App for Efficient File Handling

Navigating the Files App Interface
The Files app on your iPhone is a powerful tool for managing your documents and data. To get started, simply open the Files app and tap the Browse tab to view your files. Under the ‘Locations’ section, you can access files stored locally on your device or within iCloud Drive, which syncs across all your Apple devices.
To locate a specific file, use the search function by swiping down and entering the file name. For editing, tap the file to open it and choose the appropriate app for modifications, such as Markup for annotations or Pages for text editing. Remember, changes made to files stored in iCloud Drive will update across all devices automatically.
When managing files, it’s essential to understand the different storage locations and how to access them. This knowledge ensures efficient file handling and seamless synchronization across your Apple ecosystem.
Here’s a quick guide to the types of files you can find in the Files app:
- On My [Device]: Files stored locally on your iPhone.
- iCloud Drive: Files and folders that sync with iCloud, including documents from Pages, Numbers, and Keynote.
Managing Local and iCloud Files
Efficiently managing your files across local storage and iCloud is crucial for keeping your iPhone organized and ensuring that important documents are always within reach. Boldly navigate through the Files app to locate and manage your documents, whether they’re stored directly on your device or in iCloud Drive. Here’s how you can keep your files in check:
- On your iPhone: Open the Files app, tap the ‘Browse’ tab, and select your desired location under ‘Locations’. To delete files, tap the ‘More’ button, then ‘Select’, and choose the files or folders you wish to remove.
- In iCloud Drive: Deleting a file from iCloud Drive will remove it from all devices signed in with the same Apple ID. Make sure you only delete files you no longer need across any of your devices.
Remember, when you delete files, they’re not just removed from your iPhone—they’re also deleted from any other devices connected to your iCloud account. This synchronization ensures that your storage is consistent across all devices but requires careful management to avoid accidental data loss.
It’s important to regularly review your iCloud storage usage. You start with 5GB of free storage, but as you accumulate more content, you may need to manage your storage more actively or consider upgrading to iCloud+ for additional space.
Recovering Recently Deleted Files
Accidentally deleting important files can be a stressful experience, but the Files app on your iPhone provides a safety net. Files that you delete are not gone immediately; they are moved to the Recently Deleted folder, where they remain for 30 days, giving you ample time to recover them.
To restore files from the Recently Deleted folder, follow these simple steps:
- Open the Files app and tap the Browse tab.
- Tap on ‘Locations’ and select ‘Recently Deleted’.
- Press the ‘More’ button, then choose ‘Select’.
- Pick the files you wish to recover and tap ‘Recover’.
For individual files, a long press on the file followed by a tap on ‘Recover’ will suffice. Remember, if you exceed your iCloud storage limit, your device may remove items from Recently Deleted immediately, making recovery impossible.
It’s essential to regularly check the Recently Deleted folder and ensure that any files you wish to keep are recovered before the 30-day period expires.
Optimizing Storage with iPhone Cleanup Tools

The Benefits of Using an iPhone Cleaner
An iPhone cleaner is an essential tool for maintaining your device’s performance and storage. It automates the tedious task of locating and erasing unnecessary files scattered across your system. By using an app like CleanMy\u00AEPhone, you can effortlessly remove duplicates and similar images that are often just unsuccessful shots, freeing up valuable space for new content.
An iPhone cleaner not only helps in decluttering your device but also safeguards your personal information by cleaning out potential data remnants.
Moreover, these tools can significantly enhance your iPhone’s functionality by clearing cache, which can speed up your device and make room for more apps, photos, and videos. Remember, a well-maintained iPhone is a more efficient and reliable companion in your daily life.
Removing Duplicate Files and Similar Images
In the quest to optimize iPhone storage, tackling duplicate files and similar images is a crucial step. iPhones often accumulate multiple copies of the same photo or document, as well as numerous similar images that serve no purpose. By using an iPhone cleaner, you can swiftly identify and remove these redundancies.
An iPhone cleaner can automatically search for unnecessary data, including duplicate files and similar images, and delete them with ease.
Here are some steps to help you get started:
- Download a reputable iPhone cleaner app.
- Allow the app to scan your device for duplicate files and similar images.
- Review the findings and confirm the deletion of unwanted items.
This process not only frees up valuable space but also declutters your photo library, making it easier to navigate and enjoy your meaningful memories.
Clearing Cache to Free Up Space
Clearing your iPhone’s cache is a crucial step in managing your device’s storage and ensuring it runs smoothly. Cache data is meant to have a short life span, but it often remains uncleared, leading to unnecessary clutter and excess storage use. To clear Safari’s cache, follow these simple steps:
- Open the
Settingsapp on your iPhone. - Scroll down and select
Safari. - Choose
Clear History and Website Dataand confirm by tappingClear History and Data.
It’s important to note that while clearing the cache can free up space, the system may quickly refill it. Some users report that after clearing cache and offloading apps, significant space is freed, only to be consumed again shortly after. This can be particularly noticeable with streaming services like Netflix, Disney+, and YouTube, which can accumulate cache data.
If you’re experiencing rapid storage refill after clearing cache, consider setting a lower limit on available storage. This can prompt your device to manage cache more effectively.
Remember, your device automatically deletes cached files and temporary files when it needs more space, so manual intervention is not always necessary. However, if you’re looking to immediately free up space or troubleshoot performance issues, manually clearing the cache can be beneficial.
Managing Documents and Data Without Deleting Photos or Videos

Utilizing iOS Settings to Maximize Storage
To effectively manage your iPhone’s storage, it’s essential to familiarize yourself with the iOS settings that can help you maximize space without the need to delete your cherished photos or videos. Navigating to Settings > General > iPhone Storage provides a comprehensive overview of what’s consuming your device’s storage. Here, you’ll find valuable recommendations for optimizing storage, including the option to offload apps you rarely use.
Offloading apps is a smart way to reclaim space while preserving the app’s data, allowing you to reinstall the app without losing your information. This feature is particularly useful for apps with large storage requirements that you do not frequently use. Additionally, reviewing the list of apps and their storage usage can highlight opportunities to clear cached or temporary data that may no longer be necessary.
By taking proactive steps to manage your storage through iOS settings, you can ensure that your device operates efficiently, keeping it ready for new content and updates without compromising on your existing data.
Offloading Unused Apps While Retaining Data
When your iPhone’s storage is nearing its limit, offloading apps you don’t frequently use can be a lifesaver. Offloading an app removes it from your device but keeps its documents and data intact, allowing you to reclaim space without losing important information. This feature is particularly useful for apps that are large in size but not essential for daily use, such as travel or music production apps.
To offload an app, simply tap on it in the iPhone Storage settings and select ‘Offload App’. You’ll need to confirm this action by tapping ‘Offload App’ again. The app’s icon will remain on your home screen or in your App Library, marked with a small cloud symbol, indicating that it has been offloaded. When you need the app again, just tap on the icon to re-download it from the App Store, with all your data and settings preserved.
Offloading apps is a quick and reversible way to free up storage. It’s ideal for apps that are not in constant use but may be needed in the future. You can offload as many apps as necessary to achieve the desired storage space.
Remember, the actual app size is what gets freed up; the ‘Documents & Data’ associated with the app will remain on your device. This ensures that when you re-install the app, you can pick up right where you left off.
Restarting Your Device as a Quick Fix
While not a permanent solution, restarting your iPhone can sometimes free up storage space by clearing temporary files. Users have reported that this method can potentially free up to 1GB of space. However, it’s important to note that this is often a very temporary fix, as the system data will eventually accumulate again.
Restarting your iPhone is a quick and easy way to address immediate storage issues, but for long-term management, other strategies should be considered.
To restart your iPhone, follow these simple steps:
- Press and release the Volume Up button.
- Press and release the Volume Down button.
- Press and hold the Side button until the Apple logo appears.
Remember, this should not be relied upon as a sole method for managing your iPhone’s storage. For more persistent issues, exploring other options such as clearing ‘Other System Data’ or using iPhone cleanup tools may be necessary.
Safeguarding Your Data Before Upgrading or Selling Your iPhone

Backing Up Important Files and Documents
Ensuring that your important files and documents are safely backed up is a critical step before upgrading or selling your iPhone. Regular backups protect your data from accidental loss and make the transition to a new device seamless. Here’s how to secure your data:
- Use iCloud to automatically back up your most important data, like contacts, calendars, and photos.
- For manual backups, connect your iPhone to your computer and use iTunes or Finder to create a full backup.
- Consider using third-party cloud services or external storage devices for an additional layer of security.
Remember to verify that your backups are complete and up-to-date before proceeding with any device changes.
It’s also wise to review what’s included in your iPhone’s backup. Items like your Safari Offline Reading List, files within apps, and app content such as messages and emails (and their attachments) are typically part of an iCloud backup. However, ‘Other’ data like system settings and cached files may not be included and should be managed separately.
Wiping Personal Data Securely
Before parting with your iPhone, it’s crucial to ensure that all personal data is wiped clean to prevent any potential misuse. Performing a factory reset is the most effective way to erase all data, including contacts, messages, and installed applications. However, before initiating this process, make sure to back up any important information you wish to keep.
A factory reset will return your iPhone to its original state, as if it were brand new, removing all personal adjustments and data.
Follow these steps to securely wipe your data:
- Back up your iPhone to iCloud or your computer.
- Go to Settings > General > Reset.
- Select ‘Erase All Content and Settings’.
- Enter your passcode and Apple ID password to confirm.
- Wait for the process to complete before setting up as a new device or powering down for sale.
Transferring Data to a New Device
When upgrading to a new iPhone, ensuring a smooth transition of your data is crucial. Transfer data from your previous iOS or iPadOS device to your new one with ease by following a few simple steps. First, make sure both devices are updated to the latest iOS version. Next, select one of these transfer methods. Quick Start allows you to automatically set up a new device using your current iPhone or iPad.
Keep both devices close together during the initial setup and Quick Start will offer the option to use your current device to set up the new one. This process will transfer settings, preferences, and iCloud Keychain.
To finalize the transfer, you can choose to restore from an iCloud Backup or transfer your data directly. If you opt for a direct transfer, ensure your devices are connected to power and Wi-Fi. The time it takes to transfer will depend on the amount of data and the network speed.
Conclusion
In conclusion, managing ‘Documents and Data’ on your iPhone is crucial for optimizing storage and protecting your personal information. This article has equipped you with the knowledge to identify different types of app data, effectively clean them, and utilize specialized tools for ongoing maintenance. Whether you’re preparing for an upgrade or selling your device, the strategies outlined here are essential for maintaining your privacy and ensuring your iPhone runs smoothly. Remember to leverage iOS features and settings to maximize storage space before resorting to deletions. By following these guidelines, you can keep your iPhone organized and your data secure.
Frequently Asked Questions
How can I check my iPhone’s storage usage?
Go to Settings > General > iPhone Storage to view your storage usage. This section displays which apps and data types are occupying space, allowing you to manage them accordingly.
What is ‘Other System Data’ on my iPhone?
‘Other System Data’ includes cache and temporary files. While it can take up space, the system will automatically make room when needed by deleting these files.
Can I manage files on my iPhone without using a computer?
Yes, you can use the Files app on your iPhone to manage local and iCloud files, including searching, browsing, deleting, and recovering recently deleted files.
How do I use an iPhone cleaner to optimize storage?
An iPhone cleaner app can automatically search for and delete unnecessary data scattered throughout the system, such as duplicate files and similar images, to free up space.
Is it possible to offload apps without deleting their data?
Yes, you can offload apps to free up space while keeping their documents and data. Go to Settings > General > iPhone Storage, tap the app you want to offload, and select ‘Offload App.’
What should I do before upgrading or selling my iPhone?
Before upgrading or selling your iPhone, back up important files and documents, wipe personal data securely, and transfer data to a new device to safeguard your personal information.